Hire cart - {{ cart.TotalQuantity }} item{{ (cart.TotalQuantity != 1 ? 's' : '') }}
Cart is empty. Add gear you want to your hire cart and review them here.
There are no branches matching your search.
Login to view or create favourites and other benefits.
Register to start speeding up your hire process and keep track of your hire history.
Nice to see you again. We've made a few changes since you were last here.
Pick a colour
Favourites ({{ userFavourites.length }})
Add your frequently hired items to easily view and hire them again.
Keep your contact information with us up to date so you get the latest and best rates with us.
Hire cart - {{ cart.TotalQuantity }} item{{ (cart.TotalQuantity != 1 ? 's' : '') }}
Cart is empty. Add gear you want to your hire cart and review them here.
An integral part of building a fence is attaching the fence rails and palings. This is the following step after you’ve got your posts set in the ground for your fence to be made. Fence rails are two-by-fours that connect the fence posts. This step is fairly easy, but it’s a necessary one nonetheless to ensure that the fence posts have sufficient support.
Before you begin this step, check to see if you have the right equipment that you need for the job. If not, or if you’re not quite sure what you need, you can ask any Hirepool staff for assistance.
Always make sure to read the safety manual of each piece of equipment you use and make sure you’re taking the right safety precautions before each step of the job.

Attaching fence rails, while not the most complicated job, still require the right tools to be used. Your two main tools to be used are a circular saw and a nail gun to cut the fence railings to the correct length and to attach the rails to the posts. At Hirepool, we’ve got two different types of circular saws available which are the 175-250mm cordless circular saw and the 175-250 corded circular saw. Both of these saws will do the job, but the cordless circular saw is generally easier to handle and you won’t have to worry about any cords getting in the way. If you plan on doing a lot of cutting and want a little more power without worrying about running out of battery, a corded version will be your friend. We recommend using a circular saw instead of a manual saw for accuracy when cutting multiple posts - no one wants a wonky fence!
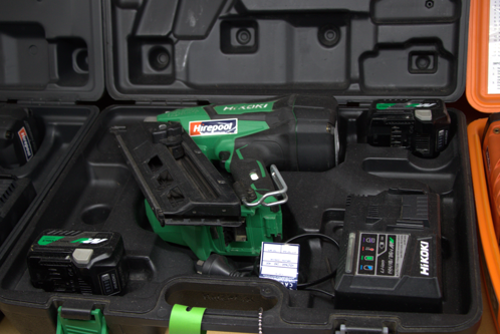
Hirepool have two different types of nail guns available for hire which are the finishing gas nailer and the framing gas nailer. The framing gas nailer is the ideal option for fencing as it’s designed for the bigger jobs compared to the finishing gas nailer.
In terms of drills Hirepool have heaps of options for you to choose from including the cordless battery drill, electric drill and more.

All fences have a top and bottom rail, but depending on the height of the fence you’re building, you may need another rail in the middle to help keep the fence in place through whatever comes its way.
Your first step should be to look at the fence design, measure the height and come to a conclusion on whether the fence needs the middle rail. A general rule of thumb is that for every 60cm of height, there should be a horizontal rail to account for a larger fence.
In this step, you need to measure and mark where the rails should go so you know where to attach them. On one of the posts you should make a clear mark of the top and bottom of where each rail will go and use a string line to transfer these positions to the other posts. You need to make sure that the bottom rail is placed at least 15cm above the ground to prevent decay from ground moisture.
Place the rails in the allocated slots. The easiest way to attach the fence railings is to nail them to the posts directly.
Repeat this for each railing on the posts.
Incorrect use of a nailgun can lead to injury. Make sure you never put your hand behind the wood you're firing into in case the nails go right through, and keep hands at least 200mm away from the end of the gun to avoid injury when using. If a nail fires and hits another nail in the wood, it typically bends like a horseshoe, so even if your hand isn't behind where you're shooting, the nail can curve and hit your hand if it's too close to the end of the gun.
Finally, using the framing nailer again, you need to attach the palings to the rails.
Use a spacer if available to help set the space in between each paling.
We are equipment hire experts - you tell us your job and we’ll get you the tools you need. Get in touch with your local Hirepool branch today or browse our equipment hire section online.
Low Stock Call First
High Demand Product: We suggest making a booking for this item in advance.
Low Stock Call First
High Demand Product: We suggest making a booking for this item in advance.
Low Stock Call First
High Demand Product: We suggest making a booking for this item in advance.
Low Stock Call First
High Demand Product: We suggest making a booking for this item in advance.